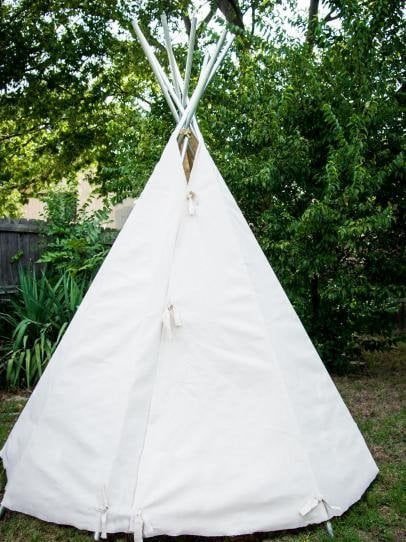
Indians and tepees, otherwise known as "tipi," go hand-in-hand. Make a simple tepee using a flat bed sheet and serve educational and recreational purposes. Add smoke flaps and smoke holes to tepees with fires built inside to let out smoke. Adjust the positions and size of the poles to produce massive or small pee pee tepees. Build a small tepee to use indoors and teach children about Indian life.
Tepee Tent Materials
Tepees are simple to make and can be used at home or in the classroom. If using as a tepee inside a classroom, a smaller version can be made. Adjust sizes for an enormous tepee to be used outdoors and add a smoke flap. Before beginning to make a tepee there are several items that will be needed:
- 8 to 10 small trees or branches 2 inches in diameter
- jute twine
- scissors
- flat bed sheet
- step ladder
- hand saw
- measuring tape
Measure straight small trees, branches, or even bamboo, if it is available, to be cut to the length of 9 to 10 feet long. Check tree thickness, it will need to be approximately two inches in diameter. Saw trees down using a hand saw and cut off any side branches to make poles straight.
Tepee Construction
On the ground, lay three of the cut trees or branches side-by-side. Position the tops and bottoms of the poles so they are even. Tie poles together at one end with jute twine about 18 inches down. Hold the poles together standing them up with the tied end facing up toward the sky. Adjust each pole leg until it stands fully erect in a tripod position forming the basic tepee frame.
Place another pole against the three standing poles and tie. Continue to attach each pole until all poles have been used. Alternate new poles in between standing poles. Decide which side will be the front of the tepee. Arrange the poles on front side of tepee further apart to allow for the entrance door.
Tepee Plans and Ideas
Spread sheet completely onto floor or ground. Before beginning to erect the tepee frame, paint sheet in multi-colored Indian patterns. Let dry. Roll sheet from one side to the other like a jelly roll. Stand on a step ladder to reach the top of the tepee to attach the sheet to the poles. Allow sheet to over lap slightly on the front side of the tepee. Cut a small hole in the sheet corner about two inches from the top.
Thread an 8-inch piece of jute twine through the hole. Tie the jute twine in a knot around the pole to attach the sheet to the top of the tepee. Secure twine above the standing poles where they have been tied together to avoid slipping. Continue unrolling and attaching the sheet around the tepee.
Cut another hole every 8 to 10 inches and thread jute twine through attaching each piece to the top of the tepee. Tying a minimum of 6 to 8 strips of twine along the top of the sheet will help secure it in place. Lay or fold back sheet corners at the front of the tepee to form the door. Jute twine or safety pins can be used to secure the door open.
To make a larger tepee, two or three sheets may need to be added. Sew or attach sheets together with safety pins or jute twine. Instead of laying sheet back to form a door, attach all side together and cut out a circular hole for a door. Always have adult supervision when playing in a tepee that is not secured to the ground.

Introducing JC – The Outdoor Gear Enthusiast and Tester behind Outdoor Tech Lab:
Dive into the exciting world of outdoor gear technology with JC, the founder and driving force behind Outdoor Tech Lab.
With a passion for backpacking, nature and a knack for outdoors gadgets, JC has embarked on a mission to help others explore the outdoors in smarter, safer, and more enjoyable ways.
Join us on the adventure as we explore the ever-evolving landscape of outdoor gear & technology.
Through insightful reviews, practical tips, testing and engaging stories, Outdoor Tech Lab is your one-stop shop for navigating the wild world of outdoor gadgets and gear in 2024 and beyond.


Leave a Reply